2020-04-17
06:56:52
8622

MongoDB
一. MongoDB安装
MongoDB是一个基于分布式文件存储的数据库。由C++语言编写。旨在为WEB应用提供可扩展的高性能数据存储解决方案。
MongoDB是一个介于关系数据库和非关系数据库之间的产品,是非关系数据库当中功能最丰富,最像关系数据库的。他支持的数据结构非常松散,是类似json格式,因此可以存储比较复杂的数据类型。Mongo最大的特点是他支持的查询语言非常强大,其语法有点类似于面向对象的查询语言,几乎可以实现类似关系数据库单表查询的绝大部分功能,而且还支持对数据建立索引。
1.1 下载与安装
MongoDB 提供了可用于 32 位和 64 位系统的预编译二进制包,可以从MongoDB官网下载安装。
官方地址:https://www.mongodb.com/
在win7系统安装mongodb需要vc++运行库,如果没有则会提示“无法启动此程序,因为计算机中丢失
VCRUNTIME140.dll”。 可以去网上下载或使用360安装vc++库。
win10则可直接安装mongodb。
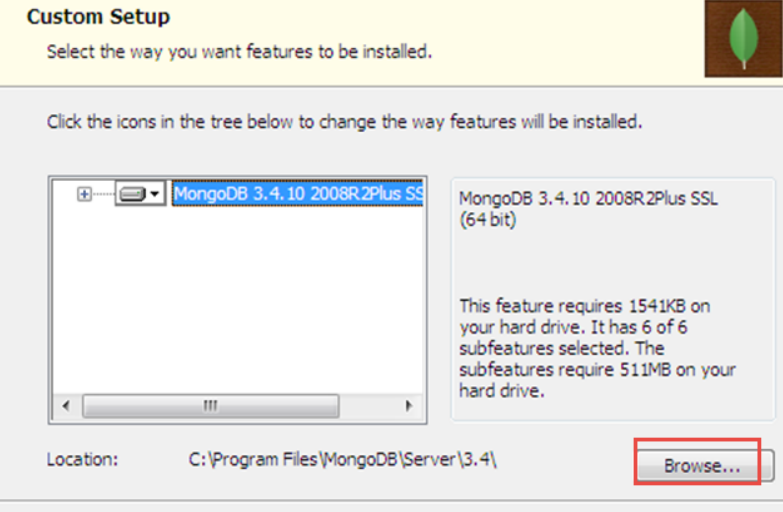
双击下载的mongodb msi文件,选择自定义安装

安装路径,选择其它盘,并且路径不要有中文,点击next完成mongodb的环境安装。
1.2 启动mondodb
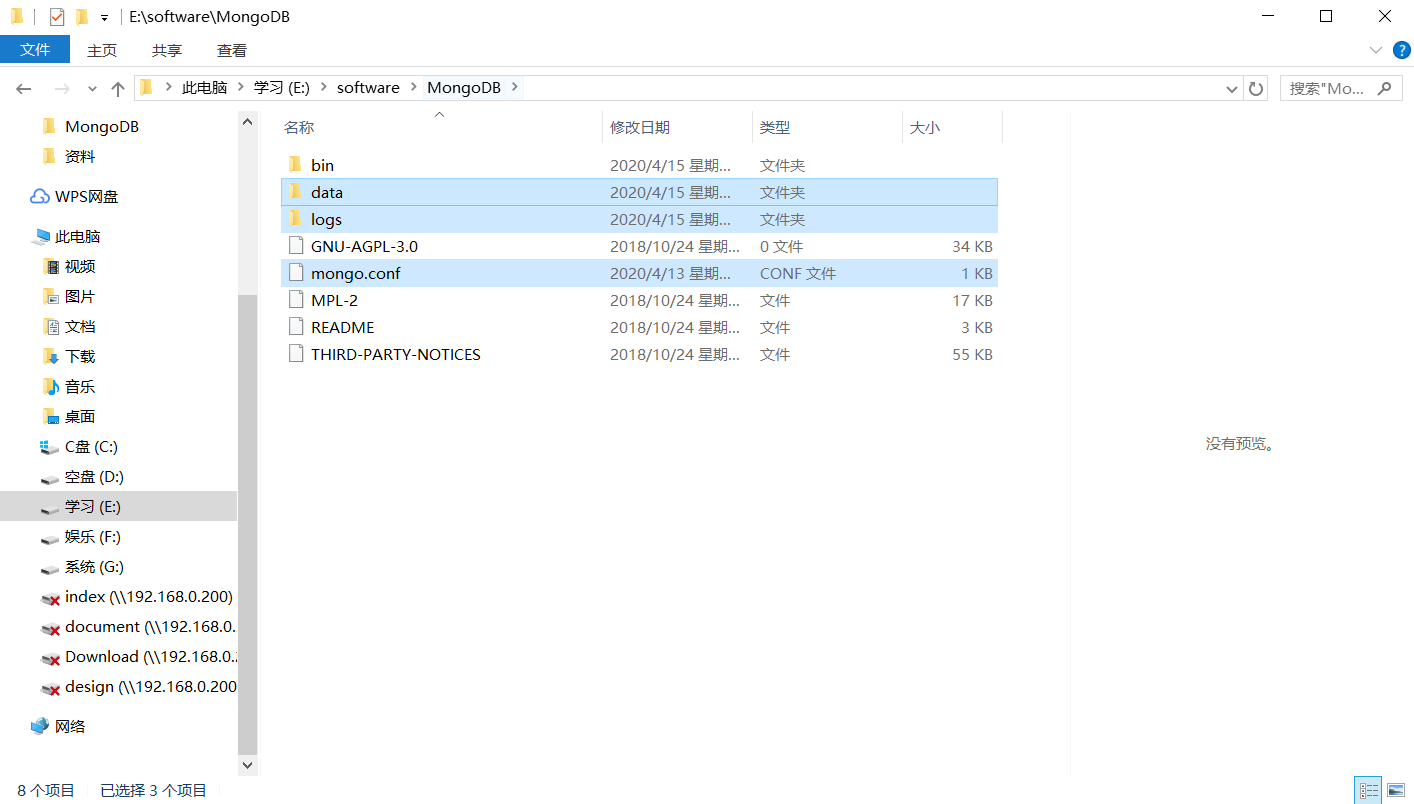
新安装的mongodb,如果没有如下文件夹,需要手动创建:
配置文件( mongo.conf文件 ),数据存储路径(data目录)、日志路径(logs目录)和logs目录内的日志文件(mongo.log文件)
修改mongo.conf文件配置,内容如下:
#数据库路径,即创建的data文件夹
dbpath=E:\software\MongoDB\data

#日志输出文件路径
logpath=E:\software\MongoDB\logs\mongo.log

#错误日志采用追加模式
logappend=true

#启用日志文件,默认启用
journal=true

#过滤掉一些无用的日志信息,若需要调试可设置为false
quiet=true

#端口号 默认为27017
port=27017

#是否开启密码验证
auth=false
1.3 安装 MongoDB服务
通过执行bin/mongod.exe,使用--install选项来安装服务,使用--config选项来指定之前创建的配置文件。
cmd进入mongdb安装目录的bin文件夹,(引号内为mongo.conf文件的绝对路径):
mongod.exe ‐‐config "E:\software\MongoDB\mongo.conf" ‐‐install
执行完成后,计算机服务内新加了mongodb的服务,可以正常打开与关闭:
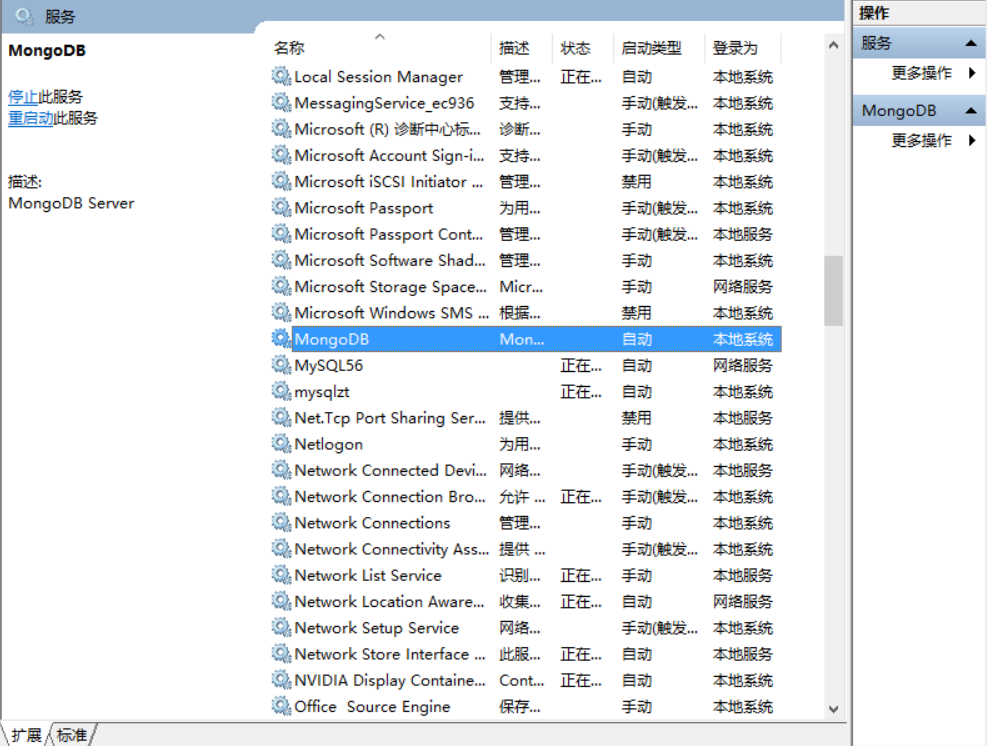
注:如果执行之后未添加成功服务,可以使用管理员cmd,进入目录重新尝试或手动添加服务
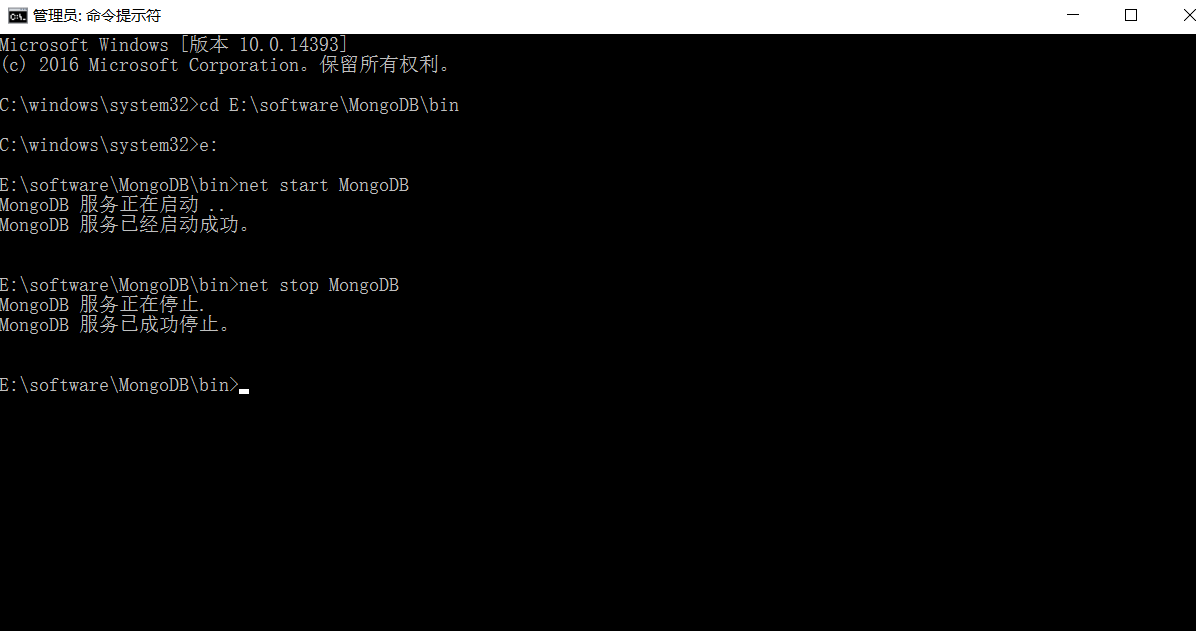
命令启动与关闭:
#启动
net start MongoDB
#关闭
net stop MongoDB
MongoDB默认端口为27017,当服务处于启动状态时,浏览器访问http://127.0.0.1:27017,出现以下提示则说明环境安装成功
It looks like you are trying to access MongoDB over HTTP on the native driver port.
1.4 安装Studio 3T
studio3t是mongodb的客户端工具。官方地址在https://studio3t.com/
安装完成后,打开软件创建一个新连接:server:localhost 端口填写27017
二. MongoDB入门
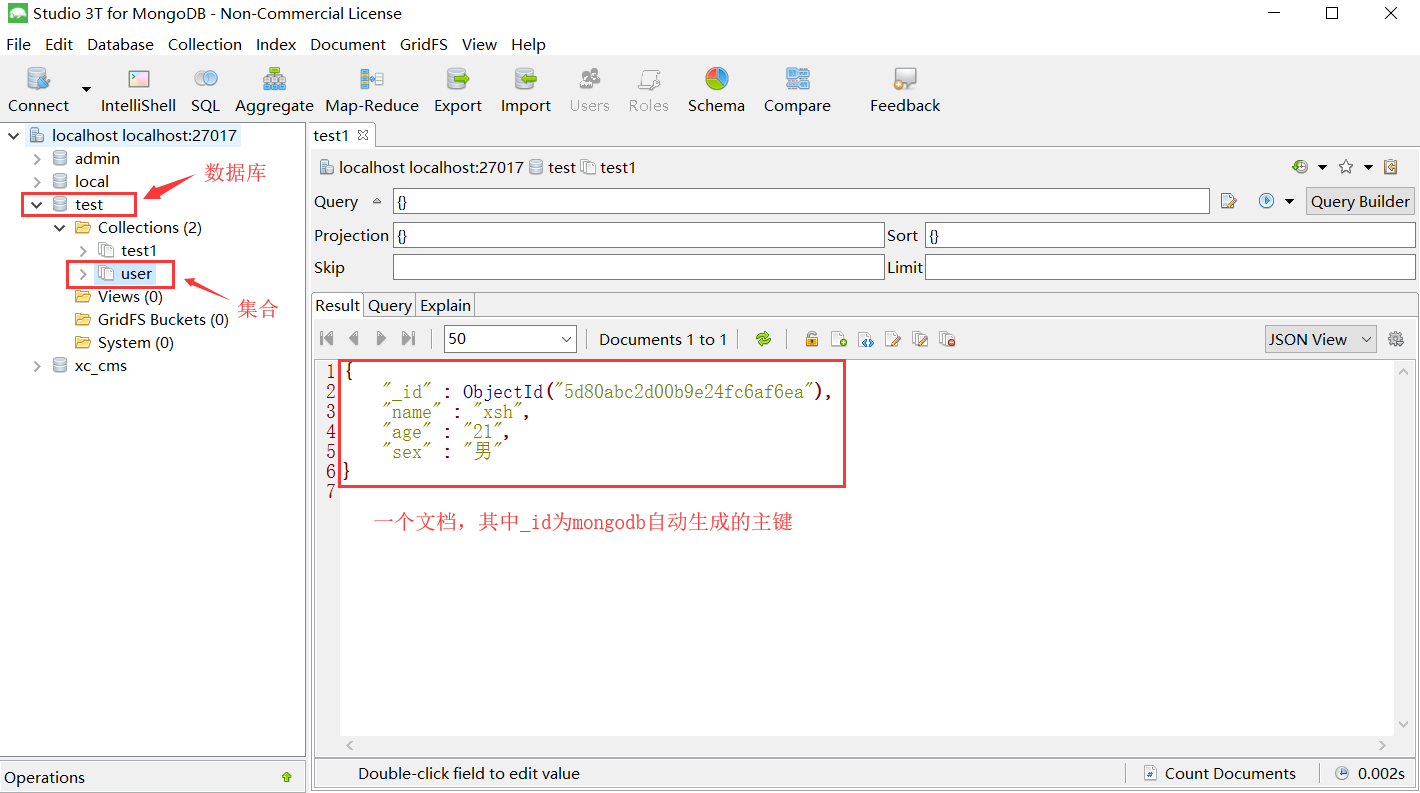
在mongodb中是通过数据库、集合、文档的方式来管理数据,下边是mongodb与关系数据库的一些概念对比:
| SQL术语/概念 | MongoDB术语/概念 | sql解释/MongoDB解释 |
|---|---|---|
| database | database | 数据库 |
| table | collection | 数据库表/集合 |
| row | document | 数据记录行/文档 |
| column | field | 数据字段/域 |
| index | index | 索引 |
| table joins | / | 表连接(MongoDB不支持) |
| primary key | primary key | 主键,MongoDB自动在每个集合中添加_id的主键 |
-
一个mongodb实例可以创建多个数据库
-
一个数据库可以创建多个集合
-
一个集合可以包括多个文档。且每个文档内的字段可以不一样,为JSON格式储存。
2.1 连接mongodb
命令格式:
mongodb://[username:password@]host1[:port1][,host2[:port2],...[,hostN[:portN]]][/[database][? options]]
mongodb:// 固定前缀
username:账号,可不填
password:密码,可不填
host:主机名或ip地址,只有host主机名为必填项。
port:端口,可不填,默认27017
/database:连接某一个数据库
?options:连接参数,key/value对
例子:
#连接本地数据库27017端口
mongodb://localhost
#使用用户名root密码为123456连接本地数据库27017端口
mongodb://root:123456@localhost
#连接三台主从服务器,端口为27017、27018、27019
mongodb://localhost,localhost:27018,localhost:27019
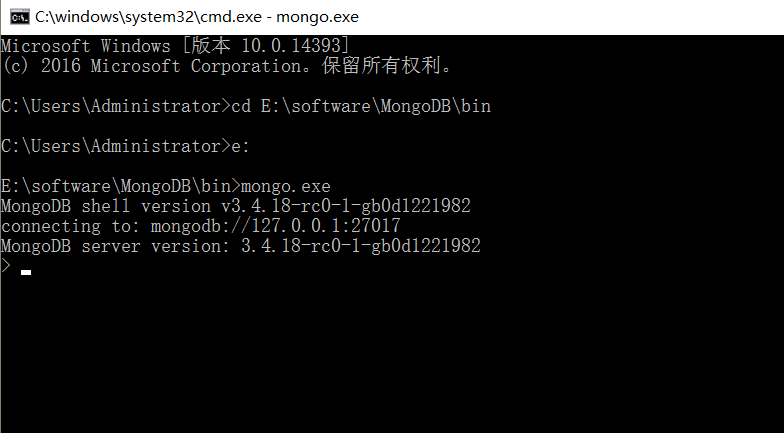
使用shell连接mongodb:(mongodb服务已开启,然后进入bin目录,再执行mongo.exe命令)
2.2 mongodb常用的命令
-
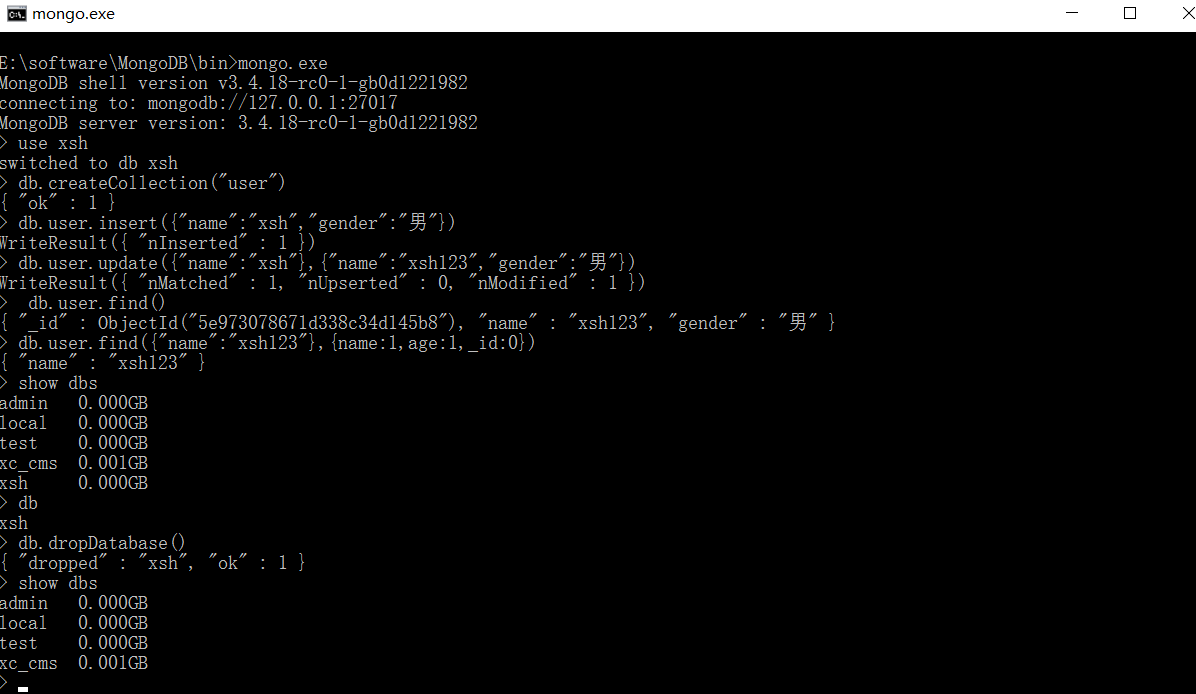
use DATABASE_NAME
如果数据库不存在,则创建数据库,存在切换到指定数据库。
-
db
查看当前选中的数据库
-
show dbs
查看所有数据库;当执行show dbs命令,当数据库为空时,不会被查询出来,即只会查出最少也有一条数据的数据库。
-
db.dropDatabase()
删除当前选中的数据库;(1)先选择要删除的数据库:use test。 (2)再执行删除:db.dropDatabase()
-
db.createCollection(name, options) name: 新创建的集合名称 options: 创建参数 ,可省略
创建集合; 例子:db.createCollection("user") 创建user集合
-
db.COLLECTION_NAME.drop()
删除集合; 例子:db.user.drop() 删除user集合
-
db.COLLECTION_NAME.insert(document)
插入文档; 例子: db.user.insert({"name":"xsh","gender":"男"})
每个文档默认以_id作为主键,主键默认类型为ObjectId(对象类型),mongodb会自动生成主键值。
-
db.collection.update(
, , ) query : 更新条件,相当于sql语句的where
update:更新之后的文档内容
options:选项,可省略
例子:db.user.update({"name":"xsh"},{"name":"xsh123","gender":"男"})
将符合条件 "name":"xsh"的第一个文档替换为{"name":"xsh123","gender":"null"}。
相当于sql语句: update user set name='xsh123 ',gender='null 'where name='xsh'
-
$set修改器
使用$set修改器指定要更新的key,key不存在则创建,存在则更新。
db.user.update({"name":"xsh"},{$set:{"name":"xsh123","gender":"null"}},{multi:true})
将符合条件 "name":"xsh"的所有文档更新name和age的值。
其中multi的值:false表示更新第一个匹配的文档,true表示更新所有匹配的文档。
-
db.user.remove(
) query:删除条件,相当于sql语句中的where
-
删除所有文档 db.user.remove({})
-
删除符合条件的文档 db.user.remove({"name":"xsh"})
-
-
db.collection.find(query, projection)
query:查询条件,可不填 ;projection:投影查询key,可不填
-
查询全部: db.user.find()
-
查询符合条件的记录 : db.user.find({"name":"xsh"})
-
投影查询 :db.user.find({"name":"xsh"},{name:1,age:1,_id:0})
定义查询结果内只显示name和age两个key,_id主键不显示。 1和0定义是否显示
-
2.3 用户操作命令
创建用户
db.createUser(
	{
		user: "<name>", pwd: "<password>",
		customData: { <any information> },
		roles: [
			{ role: "<role>", db: "<database>" } | "<role>",
			...
		]
	}
)
例:创建root用户,密码123456 角色为root
use admin

db.createUser( { user:"root", pwd:"123456", roles:[{role:"root",db:"admin"}] } )
设置了密码,如果要想使用还需要修改mongo.conf文件内的auth参数为true
mongodb内置角色如下:
-
数据库用户角色:read、readWrite;
-
数据库管理角色:dbAdmin、dbOwner、userAdmin;
-
集群管理角色:clusterAdmin、clusterManager、clusterMonitor、hostManager;
-
备份恢复角色:backup、restore;
-
所有数据库角色:readAnyDatabase、readWriteAnyDatabase、userAdminAnyDatabase、
dbAdminAnyDatabase
-
超级用户角色:root
查询与删除用户
查询当前库下的所有用户: show users
删除指定用户:db.dropUser("用户名")
修改用户
语法格式:
db.updateUser(
	"<username>",
	{
		customData : { <any information> },
		roles : [
                    { role: "<role>", db: "<database>" } | "<role>",
                    ...
				],
		pwd: "<cleartext password>"
	},
		writeConcern: { <write concern> }
)
例子: 修改root用户的角色为readWriteAnyDatabase
use admin

db.updateUser("root",{roles:[{role:"readWriteAnyDatabase",db:"admin"}]})
修改密码
db.changeUserPassword("username","newPasswd")
例子: 修改root用户的密码为123
use admin

db.changeUserPassword("root","123")
三. java操作mongodb
创建一个maven项目,pom.xml添加依赖:
    <dependencies>
        <dependency>
            <groupId>junit</groupId>
            <artifactId>junit</artifactId>
            <version>4.12</version>
        </dependency>
        <dependency>
            <groupId>org.mongodb</groupId>
            <artifactId>mongo-java-driver</artifactId>
            <version>3.6.3</version>
        </dependency>
    </dependencies>
3.1 连接
import com.mongodb.MongoClient;
import com.mongodb.MongoClientURI;
import com.mongodb.client.MongoCollection;
import com.mongodb.client.MongoDatabase;
import org.bson.Document;

/**
 * @author : xsh
 * @create : 2020-04-15 - 22:34
 * @describe: java连接mongodb(无密码)
 */
public class testConnect {
    public static void main(String[] args) {
        //连接方式一:创建mongodb 客户端
        MongoClient mongoClient=new MongoClient("localhost",27017);
        //连接方式二:采用连接字符串
/*        MongoClientURI connectionString = new MongoClientURI("mongodb://root:root@localhost:27017");
        MongoClient mongoClient = new MongoClient(connectionString);*/

        //连接数据库test
        MongoDatabase database = mongoClient.getDatabase("test");
        //连接collection(相当于mysql的表)
        MongoCollection<Document> collection=database.getCollection("user");
        //查询第一个文档(row数据)
        Document first = collection.find().first();
        //将查询的数据转为json
        String json = first.toJson();
        System.out.println(json);
    }
}
当mongodb存在密码时,连接步骤:
import com.mongodb.MongoClient;
import com.mongodb.MongoClientURI;
import com.mongodb.client.MongoCollection;
import com.mongodb.client.MongoDatabase;
import org.bson.Document;

/**
 * @author : xsh
 * @create : 2020-04-15 - 22:34
 * @describe: java连接mongodb(有密码,同时mongo.conf文件内的auth参数为true)
 */
public class testConnect {
    public static void main(String[] args) {
        //ServerAddress()两个参数分别为 服务器地址 和 端口
        ServerAddress serverAddress = new ServerAddress("localhost",27017);
        List<ServerAddress> addrs = new ArrayList<ServerAddress>();
        addrs.add(serverAddress);
        //MongoCredential.createScramSha1Credential()三个参数分别为 用户名,数据库名称,密码
        MongoCredential credential = MongoCredential.createScramSha1Credential("root", "test", "123456".toCharArray());
        List<MongoCredential> credentials = new ArrayList<MongoCredential>();
        credentials.add(credential);
        //通过连接认证获取MongoDB连接
        mongoClient = new MongoClient(addrs,credentials);
        //使用test数据库
        database= mongoClient.getDatabase("test");
    }
}
3.2 查询
public class test1{

    MongoClient mongoClient=null;
    MongoDatabase database =null;
    MongoCollection<Document> collection=null;

    /*连接数据库*/
    @Before
    public void init(){
        mongoClient=new MongoClient("localhost",27017);
        database = mongoClient.getDatabase("test");
    }

    @Test
    public void selectAll(){
        //user表示集合的名字,如果指定的集合不存在,mongoDB将会在你第一次插入文档时自动创建集合。
        collection=database.getCollection("user");
        //查询集合内的全部数据
        FindIterable<Document> documents = collection.find();
        for(Document document:documents){
            System.out.println(document);
        }
        //查询集合内数据总条数
        long count = collection.count();
        System.out.println(count);
    }

    @Test
    public void selectOne(){
        collection=database.getCollection("user");
        //查询第一条记录
        Document first = collection.find().first();
        System.out.println(first);
    }

    @Test
    public void selectQuery(){
        collection=database.getCollection("user");
        //条件查询,查询name=xsh的数据
        BasicDBObject queryObject = new BasicDBObject("name","xsh");
        FindIterable<Document> documents = collection.find(queryObject);
        for(Document document:documents){
            System.out.println(document);
        }
    }

    @Test
    public void selectQueryLike(){
        collection=database.getCollection("user");
        //模糊查询,查询name内包含x的数据
        Pattern queryPattern = Pattern.compile("x", Pattern.CASE_INSENSITIVE);
        BasicDBObject queryObject = new BasicDBObject("name",queryPattern);
        FindIterable<Document> documents = collection.find(queryObject);
        for(Document document:documents){
            System.out.println(document);
        }
    }

    @Test
    public void selectQueryOther(){
        collection=database.getCollection("user");
        //查询年龄大于20的数据
        BasicDBObject gt = new BasicDBObject("$gt",20);
        BasicDBObject queryObject = new BasicDBObject("age",gt);
        FindIterable<Document> documents = collection.find(queryObject);
        for(Document document:documents){
            System.out.println(document);
        }

        //其它关系:
      /*$gt: >
        $gte: >=
        $eq :  =
        $ne : !=
        $lt : <
        $lte : <=
        $in : in(括号内值为bson对象数组)
        $nin: not in(括号内值为bson对象数组)*/
    }

    @Test
    public void testFilter(){
        collection=database.getCollection("user");
        //使用查询过滤器查询
        Bson filter = Filters.eq("name", "xsh");//定义一个过滤器
        //根据过滤器查询,查询name=xsh的数据
        FindIterable findIterable = collection.find(filter);
        MongoCursor cursor = findIterable.iterator();
        while (cursor.hasNext()) {
            System.out.println(cursor.next());
        }
    }

}
3.3 插入数据
public class test2 {
MongoClient mongoClient=null;
MongoDatabase database =null;
MongoCollection<Document> collection=null;
/*连接数据库*/
@Before
public void init(){
mongoClient=new MongoClient("localhost",27017);
database = mongoClient.getDatabase("test");
}
@Test
public void testInsert(){
List<String> list=new ArrayList<String>();
list.add("apple");
list.add("banana");
list.add("cat");
Map<String,String> map=new HashMap<String,String>();
map.put("001","test1");
map.put("002","test2");
map.put("003","test3");
map.put("004","test4");
database.createCollection("test1");//创建集合(表)
collection=database.getCollection("test1");//连接到test1集合
Document d1=new Document();//定义一个文档,向其中追加数据
d1.append("time",new Date());//第一个参数表示字段名,第二个参数表示该字段的数据
d1.append("List",list);//支持添加复杂数据,list和map
d1.append("map",map);
//collection.insertOne(d1);//插入一条,参数类型为document
List<Document> documents=new ArrayList<Document>();//定义文档列表
documents.add(d1);//可以一次添加多个文档
collection.insertMany(documents);//插入多条,参数类型为document列表
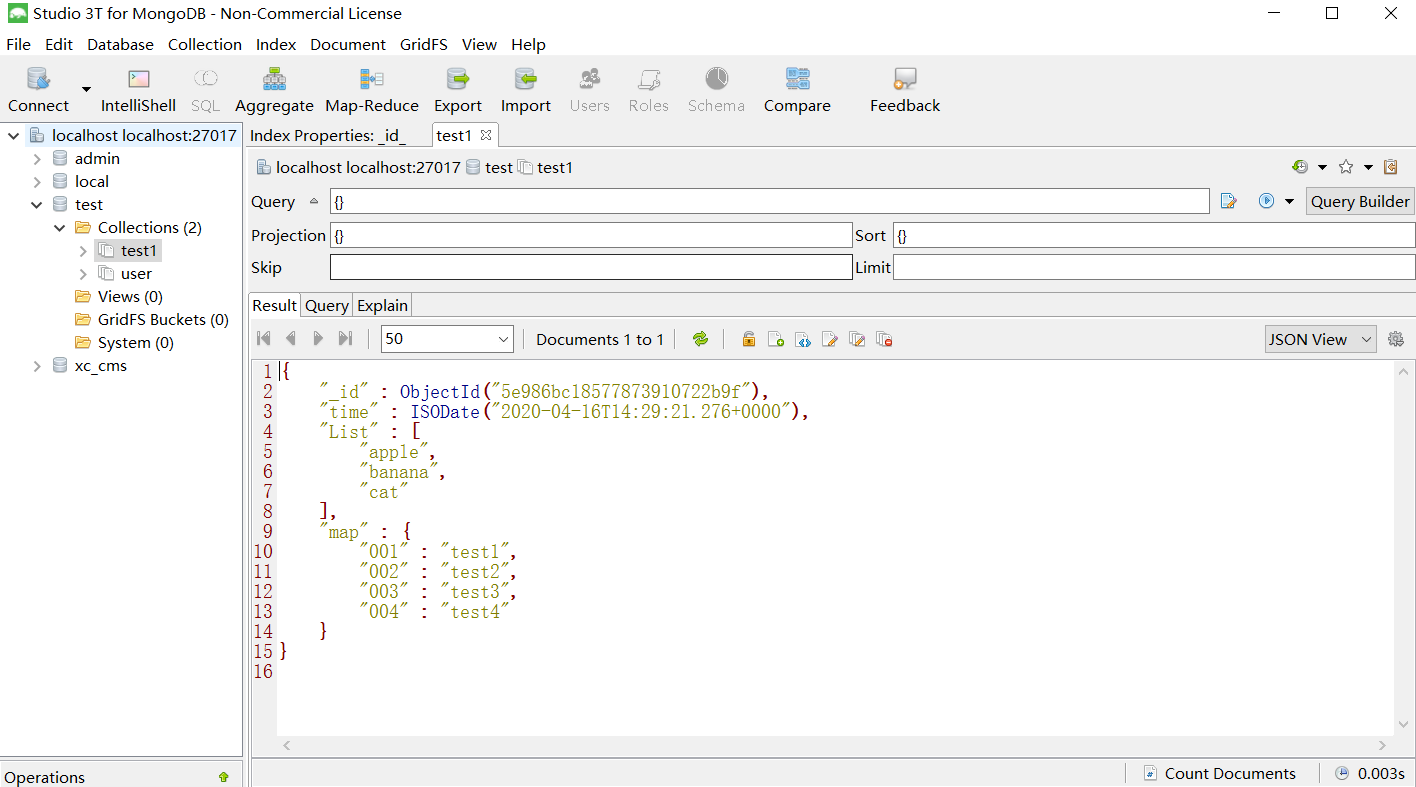
}
}
执行后,数据被插入到mongodb:
3.4 更新
public class test4 {

    MongoClient mongoClient=null;
    MongoDatabase database =null;
    MongoCollection<Document> collection=null;

    /*连接数据库*/
    @Before
    public void init(){
        mongoClient=new MongoClient("localhost",27017);
        database = mongoClient.getDatabase("test");
    }

    @Test
    public void testUpdateOne(){
        collection=database.getCollection("user");

        Bson filter = Filters.eq("name", "xsh");
        //指定修改的更新文档条件
        Document document = new Document("$set", new Document("age", 111));
        //修改符合条件的第一个文档
        collection.updateOne(filter, document);
    }

    @Test
    public void testUpdateMany(){
        collection=database.getCollection("user");

        Bson filter = Filters.eq("name", "xsh");
        //指定修改的更新文档条件
        Document document = new Document("$set", new Document("age", 111));
        //更新符合条件的全部文档
        collection.updateMany(filter, document);
    }
}
3.5 删除
public class test4 {

    MongoClient mongoClient=null;
    MongoDatabase database =null;
    MongoCollection<Document> collection=null;

    /*连接数据库*/
    @Before
    public void init(){
        mongoClient=new MongoClient("localhost",27017);
        database = mongoClient.getDatabase("test");
    }

    @Test
    public void testDelete(){
        collection=database.getCollection("user");
        //定义删除条件
        Bson filter = Filters.eq("name", "xsh");
        //删除与筛选器匹配的单个文档
        collection.deleteOne(filter);
        //删除与筛选器匹配的所有文档
        collection.deleteMany(filter);
    }
}
MongoDB

评论